How to set up a distraction-free Mac Dock for work
Build a calmer Mac Dock with native macOS settings, a task-based app layout and a simple Writing or Building mode in HeyDock. Includes compatibility and setup notes.
In this article
A useful Mac Dock should help you start the task in front of you. If it has become a row of unread badges, chat apps and things you rarely open, begin with a smaller setup.
This guide starts with macOS settings you already have, then shows how a task-based Dock can work for writing, coding and meetings. I’m Rudra, the developer of HeyDock, so the product section below is about my own app.
1. Choose the work before choosing the apps
Write down one task: draft a proposal, fix a bug or prepare a meeting. Keep the apps you need for that task easy to reach. Everything else can stay available through Spotlight or your Applications folder.
A writing setup might need Pages, Notes, Safari and Dictionary. A coding setup might need your editor, Terminal, a browser and Finder. Start with the few tools you actually use; there is no ideal number of Dock icons.
2. Remove the invitations you do not need
To remove a pinned app from Apple’s Dock, Control-click its icon and choose Options → Remove from Dock. This removes the shortcut, not the application. A running app can still appear until you quit it.
Open Apple menu → System Settings → Desktop & Dock. Adjust the Dock size and position for your screen. If seeing more icons encourages browsing, turn off Show suggested and recent apps in Dock. If you want more room for your work, turn on Automatically hide and show the Dock.
Auto-hide makes space; it does not block distracting apps or change your notifications. Apple documents the controls in its Desktop & Dock settings guide.
3. Give notifications a separate plan
A tidy Dock cannot stop every interruption. Set up a work Focus in System Settings → Focus and choose which people and apps can notify you. Keep a route for messages you genuinely need, then check the rest between work sessions.
Use Apple’s Focus setup guide for the available options. Begin with the built-in controls and see whether they solve the problem before adding another tool.
4. When your work changes, change the Dock
A single Dock can be a reasonable compromise. But the apps useful in a meeting may be the same ones that pull you away while writing.
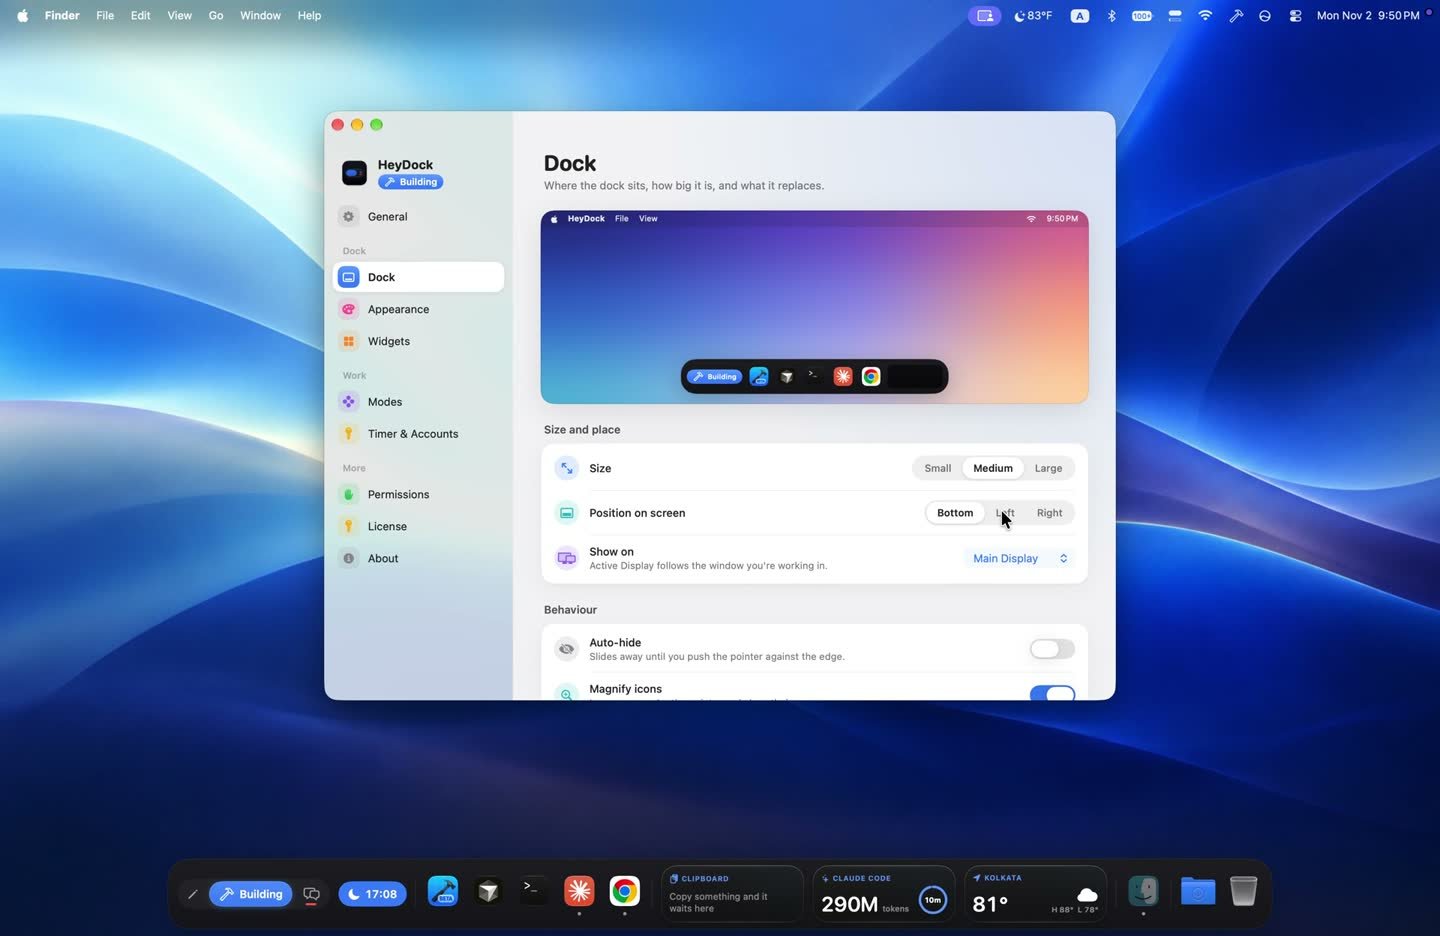
HeyDock modes give each kind of work its own apps, sites and widgets. Writing, Building, Meeting and Study can each have a different setup. Switch from the mode pill, the menu bar or the default Option-number shortcuts.
Writing: your document app, notes, reference browser and a word-count widget.
Building: your editor, Terminal, documentation and a useful timer.
Meeting: your call app, calendar and notes.
These are starting points, not rules. Keep an app in a mode when it serves that work. Switching modes changes the Dock; it does not quit your apps. The optional tidy-up setting hides other modes’ open apps.
5. Add a pause when you need it
During a HeyDock Focus session, opening an off-mode app or supported website can show a Stay-or-switch gate. Stay returns you to the work, or you can switch after the configured wait. Allow once is available when the exception makes sense.
Website gating requires the HeyDock extension in Chrome, Brave, Arc or Edge. Safari website gating is not supported. HeyDock is a nudge rather than an unbreakable lock: you can always quit it.
6. Try the new setup on one real task
Choose one piece of work with a clear next step.
Keep its essential apps in view and hide unrelated windows.
Use a work Focus if notifications are the problem.
Work for a short session and notice which tools you reach for.
Adjust the setup around what happened, rather than adding more features immediately.
If the built-in Dock and Focus are enough, keep that setup. If you repeatedly rearrange tools between tasks, a mode-based Dock may be useful.
Before installing HeyDock
HeyDock requires macOS 26 or later on Apple silicon. It can run alongside Apple’s Dock or replace it. In replacement mode, turning the option off or quitting HeyDock restores the saved Dock settings. After a crash or Force Quit, reopen HeyDock and quit it normally to restore them. See the Dock replacement and restore guide.
Accessibility supports features such as app badges and minimized windows. Optional window previews need Screen Recording permission. Check the installation guide before downloading: the app is signed but not notarized, and there is no free trial.
See whether it fits your workflow
Watch HeyDock’s real app recordings to see modes and focus controls in use. Then check current pricing, the founding offer and refund terms. Solo and Duo are one-time purchases; a 7-day refund policy is available.
The goal is a Dock that makes the next useful action easy to find. Start with one task and build from there.